Tuesday, November 13, 2012

A Block for a Beginner!

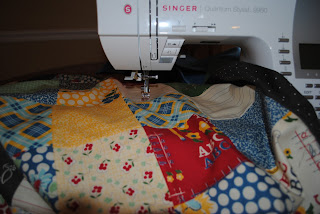
A couple of months ago I ran across a great sale on a fat quarter bundle of American Jane's School Days fabrics.  I love American Jane's fabrics because she uses such fun vibrant colors with a feel of vintage to them. This fabric line was perfect for making quilts for my kids elementary school teachers for their birthdays. I love getting a deal on a fat quarter bundle because you can really make quite a bit of quilt out of one bundle, depending on how many fat quarters are included. From this bundle, I have made two quilts so far, and I have plenty still left for a third. I wanted to show you a fun block I used for both of the quilts, and I feel it would be so easy for a beginner quilter. I threw both these quilt tops together in about two days of work and then machine quilted them at home on my machine and hand stitched the bindings. They both ended up around 50" square which is a really nice size for a throw quilt. Best of all both teachers loved them and seeing the excitement on my kids faces when they gave them to them, priceless!!


To start off you begin by cutting your fabrics into 5" squares. If you want to simplify this even further you could figure of the number of 5"squares you would need for your finished desired quilt size and buy the appropriate number of charm packs (remember these are packs of 5" squares.)


Next you will sew 9 of your 5" blocks together as shown in the picture. You sew 3 rows of three and then sew the rows together on top of one another.


Now the easy part, you line up your new large block (made up of your 9 squares) and cut directly down the middle horizontally as well as vertically. You now have 4 super scrappy blocks that look like you spent hours on them!! (Don't look too closely or you might notice I forgot to take a picture to show you how to cut them until after I had already sewn some together. For this reason, the top block doesn't exactly match, but I hope you can understand what I am trying to show you here.)


You can make so many different looking quilts with this form of block, and I love a neat scrappy quilt! The first quilt I made I used all these type of scrappy blocks and mixed and matched and then just sewed them all together. For the next quilt I sewed 9 of my 9 square blocks together for the center, added a border, and then used the scrappy blocks for the outside border, as shown in the pictures.


Have some fun getting creative and let me know if you have any questions or if this block works for some of your quilts!!


Monday, November 5, 2012

What do you get after 25 years of marriage.....Why a quilt of course!

I knew I had wanted to make my amazing aunt and uncle a quilt for their 25th year anniversary from their 24th year anniversary. When did I start working on it? A month before.... That's usually how things go in this household so I have become very accustomed to tight time frames. I had been looking for the perfect fabrics for their quilt for some time, but I just hadn't found anything that struck me. Therefore, it was time to get scrappy! I pulled out two different Moda scrap bags (I love these, yet they really can be hit or miss) and started matching other fabrics to them from my scrap bin. I love the colors in this quilt because some of them don't go together at all, but then they do in just the perfect way. I used over eighty different fabrics in this quilt and have mainly warm cozy colors, but them an occasional turquoise thrown in and even a hint of pink! Fun!!


Now that I had my fabric what to do next? Well, I have yet to ever follow a pattern for any quilt so why start now. First I just started cutting them all into even strips. Then I sewed these strips together to make blocks. When I laid it all out I just didn't love it yet. So I sat down and cut each of my blocks into an "X" making four triangles. Then I mixed all the triangles together and sewed them into new blocks, added some borders to offset the new squares, and the quilt top was complete!


I then went back to the fabric store for yet another fabric for the backing. I used a few leftover scraps from the front running through the back to give it a little "pop." I then machine quilted the quilt with an all over stippling pattern, bound it with yet another fabric from my stash, and hand stitched the back.  My favorite part of every quilt is getting to wash it for the first time. I love the way the fabric puckers together in just the perfect way to make it perfectly cozy. The quilt finished out at about 62 inches square, a perfect size for cuddling up on the couch! I love it!!

Monday, October 29, 2012

Blogger's Quilt Festival- A quilt for Hadley

Wow! So I just stumbled across the Blogger's Quilt Festival and it looks like so much fun!! Strolling through the many quilts on display took hours but Wow!!! In looking at all these beautiful quilts so many great ideas kept popping into my mind. My to-do list is getting longer and longer...  This spring seems to be a spring for weddings for my family and friends this year. I think a quilt makes an excellent wedding gift so I have really got my work cut out for myself and now so many wonderful ideas!

So I am new to the game when it comes to quilting and blogging but I thought it would be fun to at least submit an entry. I thought and thought about what my absolute favorite quilt would be and I must say, it is a quilt I made for my little girl, Hadley, for her fifth birthday.

If you have read my blog you know that I am a newbie to the sewing/quilting world. I have now been sewing/quilting for three years and I love it!! Last year for Christmas my then four year old decided she wanted a sewing machine for Christmas. This made my heart so happy. My parents bought her a little Hello Kitty sewing machine by Janome. Let me tell you if you are looking for a little girls' machine, look no further! This little green guy is great!! I even use it sometimes when I am too lazy to change thread or my sewing foot on my machine. Anyways, a couple months after that she asked me to make her a "flower quilt" for her birthday. Okay, by this point my heart is flying!! I was so excited!


 So I love a good scrappy quilt. I went to my stash and pulled all the fabrics that reminded me of my sweet little girl. I knew she wanted a "flower quilt" but I didn't just want to use flower prints so I decided to go with some dresden flowers. I pieced together my different sized dresdens and then hand blanket stitched them onto my quilt. I then took her first "big girl bedsheets" (the purple fabric with white polka dots) and used that for my border for the quilt.


As I mentioned, I love a scrappy feel which is why I then pieced together all my scraps in rows to the left. I then hand stitched "I love you. -mom" onto a row of the scraps, just for sentiment.


Then to find the fabric for the back. Hmmmm. I pondered this for quite some time. I wanted it to somehow go with my flowers but I wanted this quilt to tell a lesson beyond ages as my sweet little girl would keep growing up, even when I tried my best not to blink. While wandering around the fabric store I found these sweet little umbrellas by Riley Blake. I loved them!!


Hence Hadley's quilt became, "Find a flower in every rain."


I machine quilted the quilt with nice diagonal lines and then used some more scraps to make a nice ratty binding (something I find nice sometimes on a good scrappy quilt.)


And here is my "flower." Love!!


Blogger’s Quilt Festival Stats
Finished quilt measures : 41″x 45″
Special techniques used : applique, personal design, dresden flowers
Quilted by : Me!!
Best Category : Scrap Quilt, Baby Quilt, Throw Quilt

Friday, October 19, 2012

The Easy Quilter is Here!

Anyone know what this is? It's an "easy quilter!!" I found this thing on craigslist last week for pocket change, and I am so excited to give it a try. I absolutely love Craigslist for times such as this. I can try out something new, for a fraction of the price! I have always machine quilted all of my own quilts. In the beginning I started with nice clean straight lines (a great place for beginners to start), then ventured into diagonals, and eventually I got up the nerve to start free-handing. This contraption to the left will hold the quilt clamped in with the extra rolled up on the sides for the portion of the quilt you are working on at the time. Then you move the wooden frame by the metal handles on the sides to move the quilt according to your pattern. I'm very sceptical of this little thing but definitely worth a try. I have four quilts at present time that need to be machine quilted (can you say procrastinator...), but all of this will have to wait. I found out this morning that my daughter needs a cow girl outfit for her school program next Thursday. So I ran to my local Hancock's this morning and picked up some red bandanna fabric, lace (the sweet little girl kind), and silver sequins, and I have a new project for the weekend. I will post pics after the big show!! Has anyone tried an "easy quilter" before? What were your thoughts? I'm excited to try it out and hear from others who have given it a run as well! Have a great weekend!!

Wednesday, October 17, 2012

Pastry Talk

Precuts is a hot word for the quilting world. I remember when I first started quilting I would feel overwhelmed just picking out a background fabric and couldn’t dare to think about choosing 40 coordinating fabrics to put into a good scrappy quilt (remember I like them scrappy!) I would browse through modern quilting books for ideas and fall in love with the matchings and mis-matchings of colors, patterns, and textures that looked “Oh so yummy!!,” yet I wouldn’t even know where to start.  To say the least, picking out fabrics can be intimidating for the new quilter. That’s where precuts come in!!
What are precuts? Well precuts are exactly as the name entails, pre cut strips, squares, triangles, etc of fabric. The best part is that great designers who really have an eye for putting various colors and patterns together have already done this hard work for us and let me tell you they do a great job!  Depending on the manufacturer of the fabric you may run into slightly different names for these packs of fabric, but once you start working with them, you will be able to navigate through precuts like a pro! Precuts offer a wonderful alternative for those new to quilting for many reasons;

·         They are already cut improving cutting accuracy for your quilt so you just have to concentrate on the stitching accuracy,

·         They offer many different coordinating prints in each pack so you can get a great look even if you don’t have an overflowing scrap drawer (closet),

·         And lastly, they are just so much fun! I encourage you to check out some pre-cuts by Moda, Riley Blake, and many other designers and I can guarantee you will fall in love with some of the fabric pairings! Beautiful!!

Many of the names you will hear are names of pastries! Like we really need to be thinking of yummy yummy bakery findings while we are trying to quilt….I have listed a few of the popular names of precuts below to get you started:


Charm packs: Charm packs are stacks of about 20-40 different pieces of fabric precut into 5” squares. Occasionally you may find a charm pack cut into 6” squares so just keep an eye out on the label. Make sure you also read how many squares come in a packet you choose so you will ensure you have enough for your quilt.


Layer Cakes: Layer cakes are very similar to charm packs but are double in size, 10” squares. Most layer cakes contain around 30-40 pieces.


Jelly Rolls: Jelly rolls are 2.5” strips of fabric. They are the WOF (width of fabric) in length so usually about 44-45.” A jelly roll usually contains around 20-40 strips of fabric.


Honeybuns: Honeybuns are very similar to jelly rolls but are smaller. These strips are 1.5” x WOF. They usually have around 40 strips of fabric.


Fat Quarter bundles: These are my favorite!! I love to find a good deal on a fat quarter bundle! These are packs of coordinating fat quarters (1/4 of a yard of fabric cut lengthwise rather than widthwise.) Packs can really vary by how many fat quarters are in a bundle so make sure you take into account how many quarters you need. Many times you can use a bundle to make multiple quilts.


Turnovers: Turnover are stacks of 80 6" triangles. Lots of fun!!


 I hope this helps you wade through the waters of pastry chatter next time you are in the market for some quilting precuts! I used the pictures from www.missouriquiltco.com which has a wonderful selection of precuts available to choose from with good prices. There are many other great options as well, just google “quilting precuts” and set aside a few hours! Once you build up your stash drawer (closet) you may find yourself buying these less and less, but they are an excellent option for a beginning quilter and the designers do such a nice job on pairing fabrics!! Good luck buying just one!!


Tuesday, October 16, 2012

Happy Stitches!


So as I mentioned I’m starting this blog to hopefully provide some tutorials and some good chatter about my crafting that keeps me busy.  I hope you can learn from me and I know there is so much I can learn from you.

My sewing story began three years ago when my husband got me a sewing machine for Christmas. It was your typical basic Singer, but such a great starter machine. I have since moved up in the sewing machine world and passed that little guy on to a dear friend who is starting quilting which makes my heart swell! Anyways, the first thing I sewed on that new machine was a little quilt kit packet purchased at AC Moore’s (which stands for craft store on the East Coast.) Ever since I have fallen in love with quilting! I have since made 17 quilts and counting and with every single one, I learn something new. Don’t get me wrong my sewing machine is often busy sewing other fun things (especially this time of year with Halloween creeping upon us,) but quilting has my heart. I love a good scrappy feel with lots and lots of beautiful crazy colors. I love the feel of good quality fabrics against your skin (much to my budget’s disappointment.) I love the little mistakes that each quilt holds, but most of all I love giving them away (which is why I never have a quilt to cozy up with on the couch in my own home!!) I hope to post some fun quilting and other tutorials on here if I can ever figure out how to post a picture of the quilt that you can click on and it goes to the tutorial. I have literally spent the last two days trying to figure this out and I finally just decided to start blogging already!! If there are any experts on this matter I would love some help!
 
This blog may be a little slow for the seasoned quilter (as I am still learning everyday) but I am trying to make a blog to help those new to the game and that is packed with great information and lots of fun along the way! If any of my posts are confusing or if you need any guidance on the tutorials (once I can figure out that clicking thing mentioned above,) please don’t hesitate to comment or shoot me an email. I would love to hear from you!!

Until then! Happy stitches!!!

Saturday, October 13, 2012

About Me

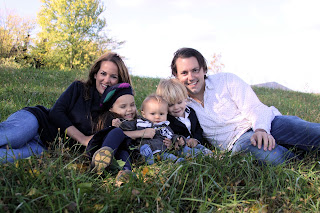
We recently moved from Roanoke, VA  to Springdale, AR with our 3 kids, 2 dogs, kitten, 30 fish, and a much needed minivan. Seven years ago I married the best hubby a girl could dream of and together we simply adore always living life a step behind. We are never on time to anything (see above) and our house is in a state of beautiful chaos. Hadley is 5 and our tomboy in a tutu. She runs the show around here and I dare you to cross her. If crossed she is liable to sic her imaginary cricket, and close friend, "Jiminy" on you and who knows what would happen. Grayson is 3 and the biggest charmer cheesehead in the city. His sweet chubby cheeks each tucked with a dimple with have you falling for his charm in no time. He adores his sissy, dumptrucks, and batman. Finally sweet baby Beckett. Beck recently turned 20 months old and would probably appreciate us dropping the name “baby.” He loves music and will break into dance anytime it hits him. Sydney is our 10yr old sweet coonhound who is content to lie on the couch and would rather you try not to bother her unless you feel the urge to give her a bone. Sam is our 5 yr old bassett whose brain is the size of a pea but with a heart of gold. Daisy is our new kitten that has earned the name “Crazy Daisy” in every way. We have a gazillion fish but all pretty approachable. So that is our family in a short essay, so why start a blog?


I am starting up a blog to try and share with others projects that my crafting tendencies are taking me on. I love quilting and most of my projects entail quilting in some way, although we are all in need of the occasional mermaid tail or superhero cape that must be completed. I am hoping to post tutorials of my crafts and update you on my progress and hopefully hear about yours as well. I hope to share links of other amazing crafters so we can all grow together. Along the way you may here a few of my "parent of the year award" stories, but that is just what makes life grand and laughable. Recently I had commented that most days we are just about five steps behind everyone else but on that particular day we were getting lapped. That pretty much sums up our day to day life, but somewhere in our house there are always giggles going on so we let it slide!! I look forward to meeting you, catching up with you, and sharing our times! I hope to see you here often!!